

Key Takeaways
- Start by identifying how the bathroom functions now and where it creates daily frustration.
- Separate essential improvements from optional upgrades before requesting estimates.
- Build safety into the layout with secure footing, useful lighting, and clear walking paths.
- Select materials that can handle moisture and regular cleaning.
- Address ventilation, plumbing, and electrical needs before finalizing finishes.
- Leave room in the budget and schedule for hidden conditions and project adjustments.
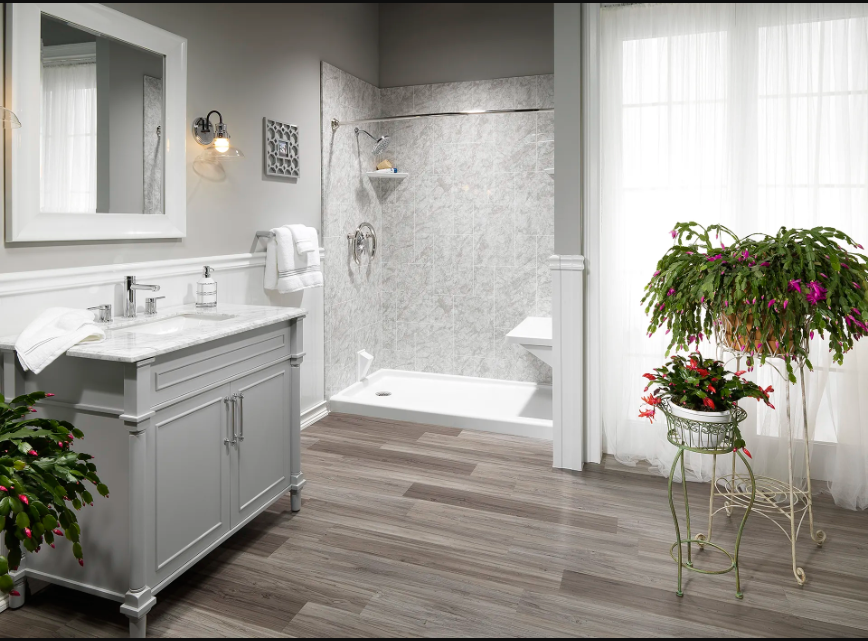
A bathroom remodel is most successful when it begins with daily routines rather than paint colors or tile samples. Whether the project involves a complete rebuild or a focused update, homeowners exploring faster renovation options may find it helpful to learn how to remodel your bathroom in one day when the existing layout and project goals make that approach suitable. The important first step is deciding what needs to work better for the people who use the room.
Bathrooms are compact spaces that must handle moisture, heat, storage, cleaning, privacy, and movement. A thoughtful plan can make the room more comfortable today while reducing the chance of rushed decisions, inconvenient layouts, or costly changes after construction is underway.
Why Bathroom Planning Deserves More Attention
A bathroom may be one of the smallest rooms in a home, but it has a demanding job. Water can reach floors, walls, fixtures, and storage areas every day. Good planning considers the full experience, from opening the door in the morning to cleaning the shower at the end of the week.
Safety deserves attention as well. Wet surfaces and tight spaces can make balance more difficult, particularly for children, older adults, and anyone recovering from an injury. The risk of falls is one reason to evaluate footing, lighting, and support before selecting decorative finishes. A safer bathroom can still feel personal, warm, and well-designed.
Step 1: Study the Existing Bathroom
Before choosing fixtures, spend several days noticing how the room works. Consider each person’s routine for bathing, grooming, dressing, storing products, and cleaning. This review often reveals priorities that are easy to miss when planning starts with inspirational photos.
Notice where water collects after showers or baths, whether the floor feels slick when wet, and how easily everyday items can be reached and stored.
- Notice where water collects after showers or baths.
- Check whether the floor feels slick when wet.
- Assess lighting at the vanity, toilet, shower, and entry.
- See whether the door interferes with movement or storage.
- Identify items that are hard to reach or frequently clutter the counter.
- Watch for lingering humidity, condensation, or musty odors.
Step 2: Separate Must-Haves From Nice-to-Haves
Create two lists before speaking with contractors. The first should address problems affecting safety, access, water control, or everyday functioning. The second should cover aesthetic preferences and comfort features that would be welcome if the budget allows.
- Write down the biggest frustrations with the current room.
- Rank each proposed change by function, safety, appearance, and cost.
- Decide which fixture locations must remain within the existing footprint.
- Protect the budget for essential work before adding lower-priority extras.
Step 3: Build Safety Into the Layout
A safer bathroom should support ordinary movement without making the space look institutional. The best choices depend on the household, the available space, and how people actually use the room. Clear pathways between the door, toilet, vanity, and bathing area make everyday use easier.
Practical Features to Consider
- Slip-resistant flooring in wet areas.
- Even lighting near the mirror, shower, and toilet.
- Rounded edges where sharp corners create a concern.
- A low-threshold or easier-entry shower configuration.
- Securely installed support bars where they are needed.
- Storage that does not require stretching, bending, or stepping around obstacles.
Accessibility is not one-size-fits-all. A person who occasionally experiences balance issues may need different features than someone who uses a walker or needs room for assistance. Plan dimensions and supports around real movement patterns instead of relying on a generic checklist.
Step 4: Choose Materials That Are Easy to Live With
Attractive finishes should also be practical. Compare options based on traction, water exposure, cleaning needs, repairability, and how visibly they show soap residue or water spots. Materials that look good in a showroom may require more upkeep than expected in a heavily used bathroom.
- Choose flooring with dependable grip when wet.
- Limit difficult-to-clean joints in areas that receive frequent spray.
- Select finishes that tolerate commonly used bathroom cleaners.
- Use moisture-resistant materials around tubs, showers, and sinks.
- Consider colors and textures that make routine cleaning less demanding.
Step 5: Plan Ventilation, Plumbing, and Electrical Work
New surfaces cannot solve poor airflow, weak water pressure, aging supply lines, or outdated wiring. Review the exhaust fan, drain performance, shutoff valves, outlets, lighting, and water connections early in the design process. The Environmental Protection Agency notes that bathroom ventilation removes unwanted moisture, so a fan should vent outdoors rather than into an attic or other enclosed space.
Local permit and inspection requirements can differ by jurisdiction. Confirm who will handle permits, inspections, and any required licensed trade work before the project begins. This discussion should be part of the written scope, not an afterthought.
Step 6: Set a Budget With Room for Surprises
A project budget is more useful than a wish list because it accounts for the entire scope of work. Include labor, materials, permits, disposal, delivery, temporary household disruption, and possible repairs discovered behind finished walls or beneath flooring.
- Request a written scope of work and itemized estimate.
- Ask how changes are priced, approved, and documented.
- Set aside a contingency amount for concealed conditions.
- Compare payment schedules, warranties, and completion terms.
- Make sure allowances for fixtures and finishes are clearly identified.
The lowest initial estimate is not always the lowest final cost. Carefully comparing scopes helps reveal whether one proposal includes preparation, waterproofing, cleanup, or finishing work that another excludes.
Step 7: Reduce Disruption During the Remodel
Construction affects more than the bathroom itself. Before work begins, decide whether another bathroom will remain available and where family members will store essentials. Remove toiletries, towels, artwork, and fragile items, then confirm work hours, dust control, debris removal, and water shutoff procedures.
Also, ask about the complete schedule. Material delivery, inspections, drying time, cleanup, and final corrections can influence the finish date. A realistic timeline gives everyone a clearer expectation of what will happen and when.
Step 8: Plan for Long-Term Comfort
Future-friendly design does not require predicting every possible need. It means choosing flexible features that can continue serving the household if routines, mobility, or family size change. Leave room to move comfortably, place storage within easy reach, and consider lever-style hardware that is simple to operate.
If future grab bars may be useful, discuss adding wall reinforcement before surfaces are finished. Night-friendly lighting, accessible storage, and an easier shower entry can blend naturally into modern, traditional, or transitional designs.
Questions to Ask Before Hiring a Contractor
- Who will manage the project from start to finish?
- Who handles permits and inspections?
- What happens if hidden damage or outdated systems are found?
- How are design changes approved and priced?
- What cleanup and disposal are included?
- What labor and material warranties apply?
- Can the contractor provide recent references for similar work?
A Final Pre-Construction Checklist
- Project goals and priorities are written down.
- Layout and fixture locations are confirmed.
- Materials are selected and ordered.
- The budget includes a contingency fund.
- Permits, inspections, work dates, and cleanup expectations are discussed.
- Safety features match the household’s needs.
Conclusion
A successful bathroom remodel is about more than a fresh appearance. It should make everyday routines easier, safer, and more comfortable. By defining the scope, selecting practical materials, planning hidden systems, and preparing for the unexpected, homeowners can create a bathroom that works well for years to come.
